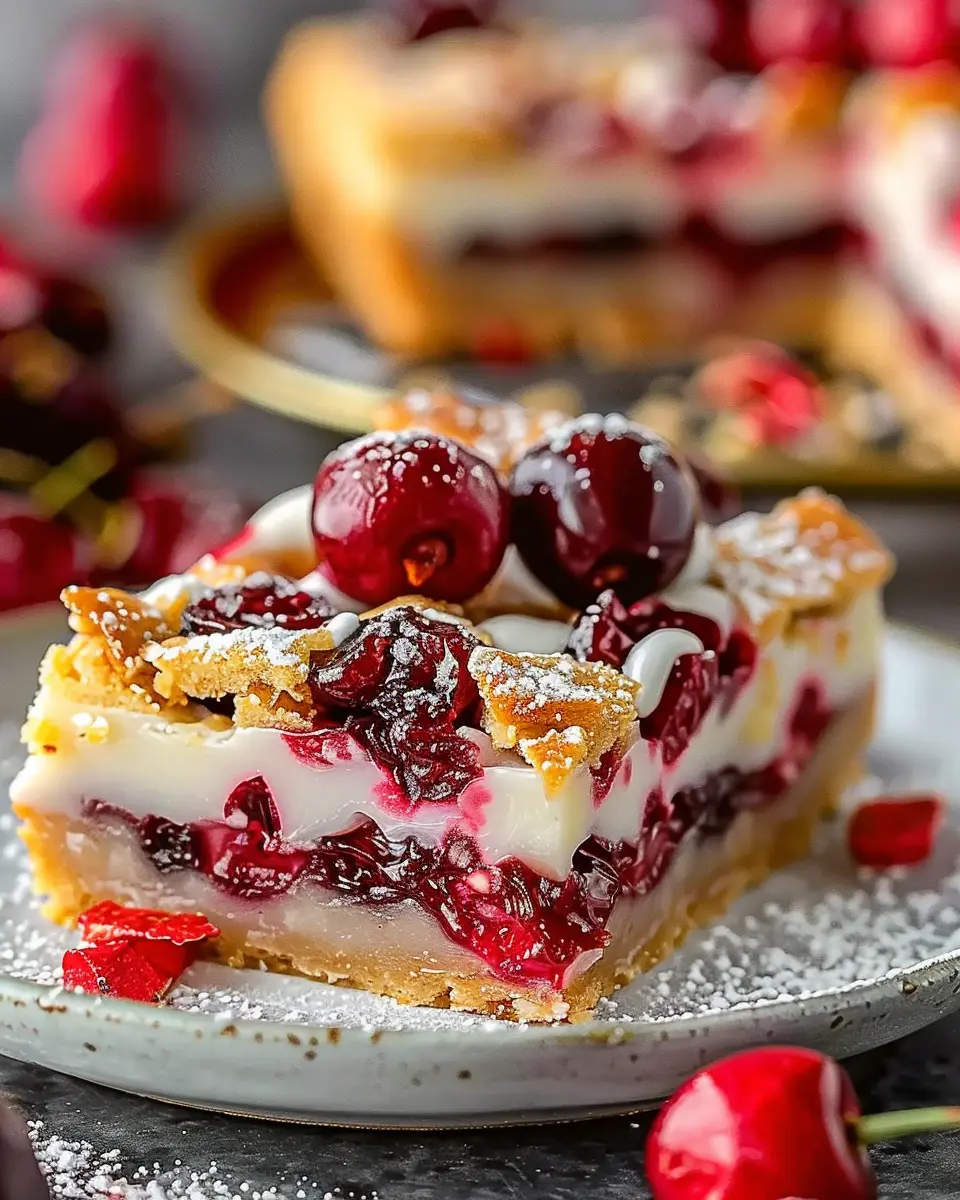
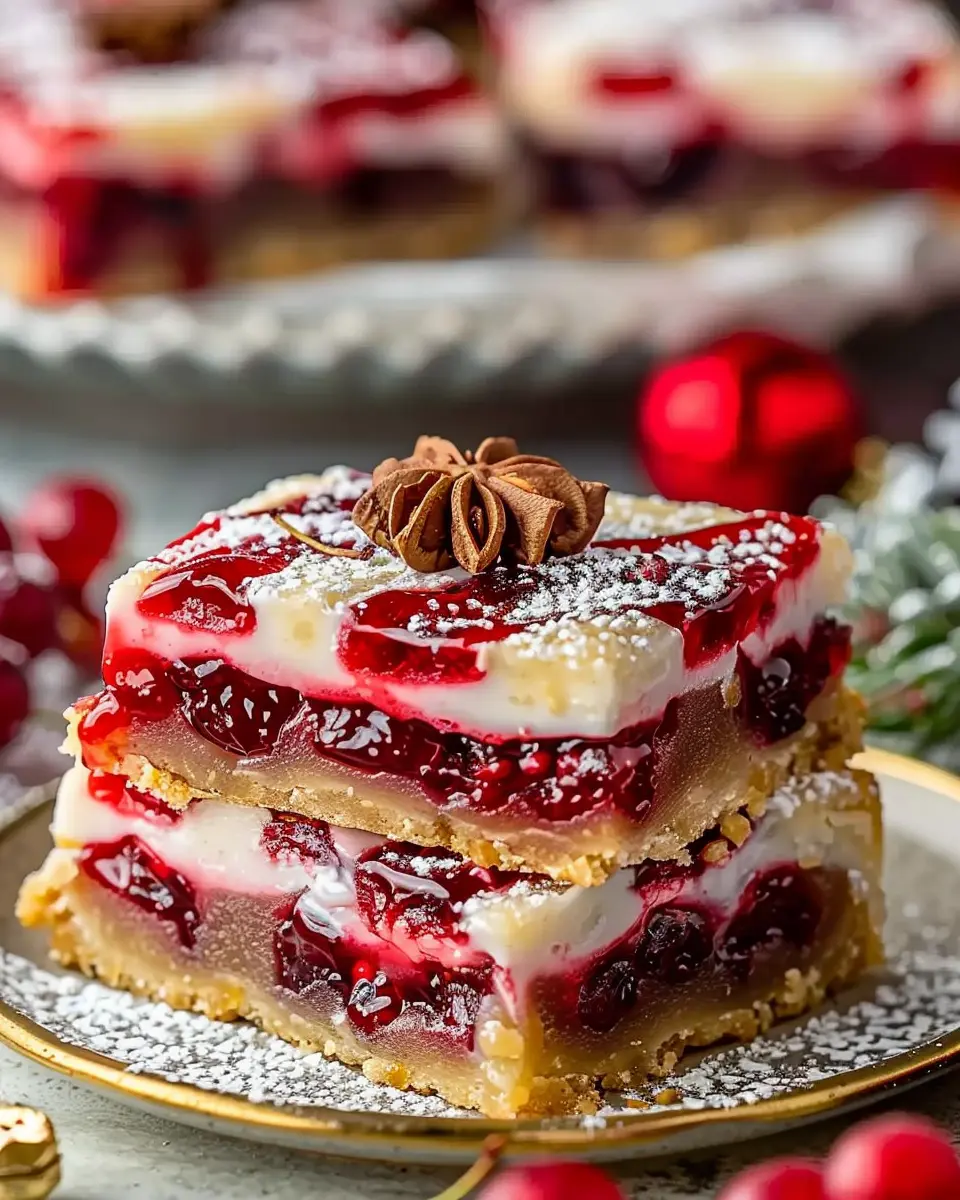
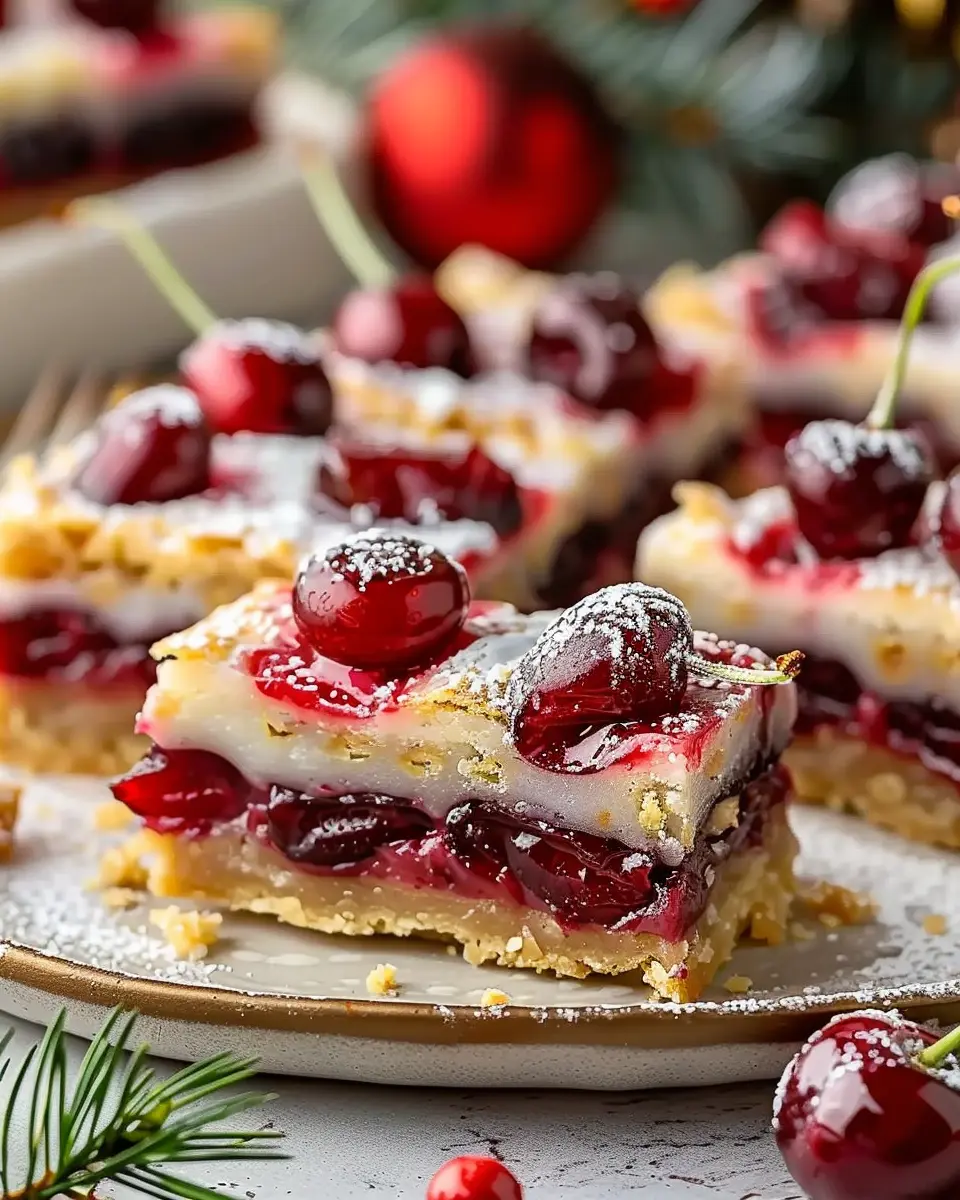
Introduction to Christmas Cherry Bars
As the holiday season approaches, nothing quite whispers comfort and joy like Christmas Cherry Bars. These delightful treats blend the tartness of cherries with a sweet, buttery base—creating a dessert that satisfies both cravings and the festive spirit. But what makes these bars specifically a holiday favorite? Let’s dive into the sweet allure of this seasonal delight.
Why are Christmas Cherry Bars a holiday favorite?
There’s a certain magic to preparing and sharing baked goods during the holidays. Many people reminisce about childhood memories surrounded by family while enjoying festive treats like Christmas Cherry Bars. What sets these bars apart is their versatility; they can be made to suit various tastes and dietary needs. Whether you’re using fresh, frozen, or canned cherries, you can still achieve that signature burst of flavor.
The vibrant red cherries also add a pop of color to your holiday dessert table, making them not only delicious but visually appealing. It’s hard to resist reaching for a second piece when the bars glisten with that beautiful cherry glaze! Plus, they are easy to make in large batches, perfect for holiday gatherings or potlucks.
According to the National Retail Federation, more than 50% of Americans participate in holiday baking, and Christmas Cherry Bars are an approachable, crowd-pleasing recipe that appeals to every age group. Whether you’re a seasoned baker or a beginner, these bars offer a straightforward recipe that guarantees good results.
Imagine gathering friends or family and sharing stories over these delightful squares. Each bite brings a little taste of nostalgia that creates lasting memories. The cherry-infused flavors and buttery texture form a delectable harmony that’s hard to forget.
As you prepare to celebrate the season, consider incorporating these lovely bars into your holiday traditions. For inspiration on how to serve them or variations to try, check out AllRecipes or Taste of Home.
In the spirit of the holidays, Christmas Cherry Bars are more than just a sweet treat—they are a festive experience that embodies the warmth of togetherness. Let’s get started on creating this cherished holiday dish!
Ingredients for Christmas Cherry Bars
Essential ingredients for the perfect cherry bars
Creating delectable Christmas Cherry Bars starts with some key ingredients that ensure both flavor and texture. Here’s what you’ll need:
- All-purpose flour – The foundation of your bars, giving them that delightful structure.
- Granulated sugar – Perfect for sweetness that balances the tartness of the cherries.
- Butter – Use unsalted for better control over the flavor – it adds richness.
- Cherries – Fresh or canned, depending on what you can find. Ensure they’re pitted and chopped!
- Eggs – They bind everything together, giving your bars a soft, chewy interior.
- Baking powder – A little lift for that perfect bite.
These basic ingredients come together to create a treat that’s sure to delight during the festive season.
Optional ingredients for a unique twist
Want to take your Christmas Cherry Bars to the next level? Consider mixing in these optional ingredients:
- Almond extract – Just a splash can elevate the cherry flavor beautifully.
- Walnuts or pecans – Add crunch and a nutty flavor that balances the cherry’s sweetness.
- Coconut flakes – For a tropical twist, mix in shredded coconut.
- Chocolate chips – Because, let’s be honest, chocolate makes everything better!
Personalize your bars with these additions, and they might just become your new holiday tradition. To explore more versatile cherry recipes, you might want to check out Bon Appétit for inspiration!
With this combination of essential and optional ingredients, your Christmas Cherry Bars will surely be a hit at any holiday gathering. Happy baking!
Step-by-step Preparation of Christmas Cherry Bars
Making Christmas Cherry Bars is a delightful addition to your holiday baking repertoire. This delectable treat combines a buttery crust with a sweet, tangy cherry filling, making it the perfect option for gatherings, gifts, or simply indulging in some festive cheer. Here’s how to prepare these delicious bars step-by-step.
Gather your ingredients
Before diving into the cooking process, it’s essential to gather all your ingredients. Having everything ready not only makes the process smoother but also allows the creative juices to flow without interruption. For this recipe, you will need:
-
For the crust:
-
1 ¾ cups all-purpose flour
-
½ cup powdered sugar
-
¾ cup unsalted butter, softened
-
For the cherry filling:
-
2 cups fresh or frozen cherries (pitted)
-
½ cup granulated sugar
-
2 tablespoons cornstarch
-
1 tablespoon lemon juice
-
1 teaspoon vanilla extract
-
For topping:
-
¼ cup almonds or walnuts (optional, for added crunch)
With your ingredients at hand, you’re ready to move to the next stage!
Preheat the oven to the right temperature
Now that you have everything ready, it’s crucial to preheat the oven to 350°F (175°C). This step is vital as it ensures an even bake. While the oven heats up, take a moment to prepare your baking dish; a 9×9 inch square pan works perfectly for this recipe. Grease it lightly or line it with parchment paper for easier removal later.
Prepare the crust
With the oven preheating, it’s time to whip up the crust! Start by combining the all-purpose flour and powdered sugar in a mixing bowl. Mix them briefly to combine. Then, cut in softened butter until you achieve a crumbly texture. You can use a pastry cutter or your fingers for this job—whichever is most comfortable for you!
Once combined, press the mixture evenly into the bottom of your greased baking pan. The crust will create a firm base for your Christmas Cherry Bars, so make sure it’s well-packed. Use a fork to poke a few holes in the crust; this helps it bake evenly.
Mix the cherry filling
Now comes the fun part: the cherry filling! In a separate bowl, combine your cherries, granulated sugar, cornstarch, lemon juice, and vanilla extract. Gently mix everything together, ensuring the cherries are well-coated in the sugar and cornstarch mixture. The cornstarch will help thicken the filling as it bakes, creating that delightful gooey texture we all crave.
If you’re using frozen cherries, allow them to thaw and drain excess juice before mixing.
Assemble the bars
With both the crust and filling ready, it’s time to assemble! Pour the cherry filling over the crust, spreading it evenly to cover the entire surface. If you’re feeling adventurous, sprinkle some chopped almonds or walnuts on top for an extra crunch. This added texture might make these Christmas Cherry Bars even more memorable.
Bake to perfection
Carefully place your baking pan in the preheated oven and bake for 30-35 minutes or until the filling bubbles and the edges of the crust are golden brown. To make sure your bars are perfect, keep an eye on them in the last few minutes of baking.
Once they’re out of the oven, let them cool in the pan for at least 15 minutes before slicing into squares. For the best taste, let them sit a bit longer so the filling can set.
And there you have it—delicious Christmas Cherry Bars ready to be served! Whether you share them with friends or keep them all to yourself, these festive treats will surely bring joy to your holiday season. Enjoy the process as much as the end result! To explore more delightful recipes, check out this article on creative holiday desserts.
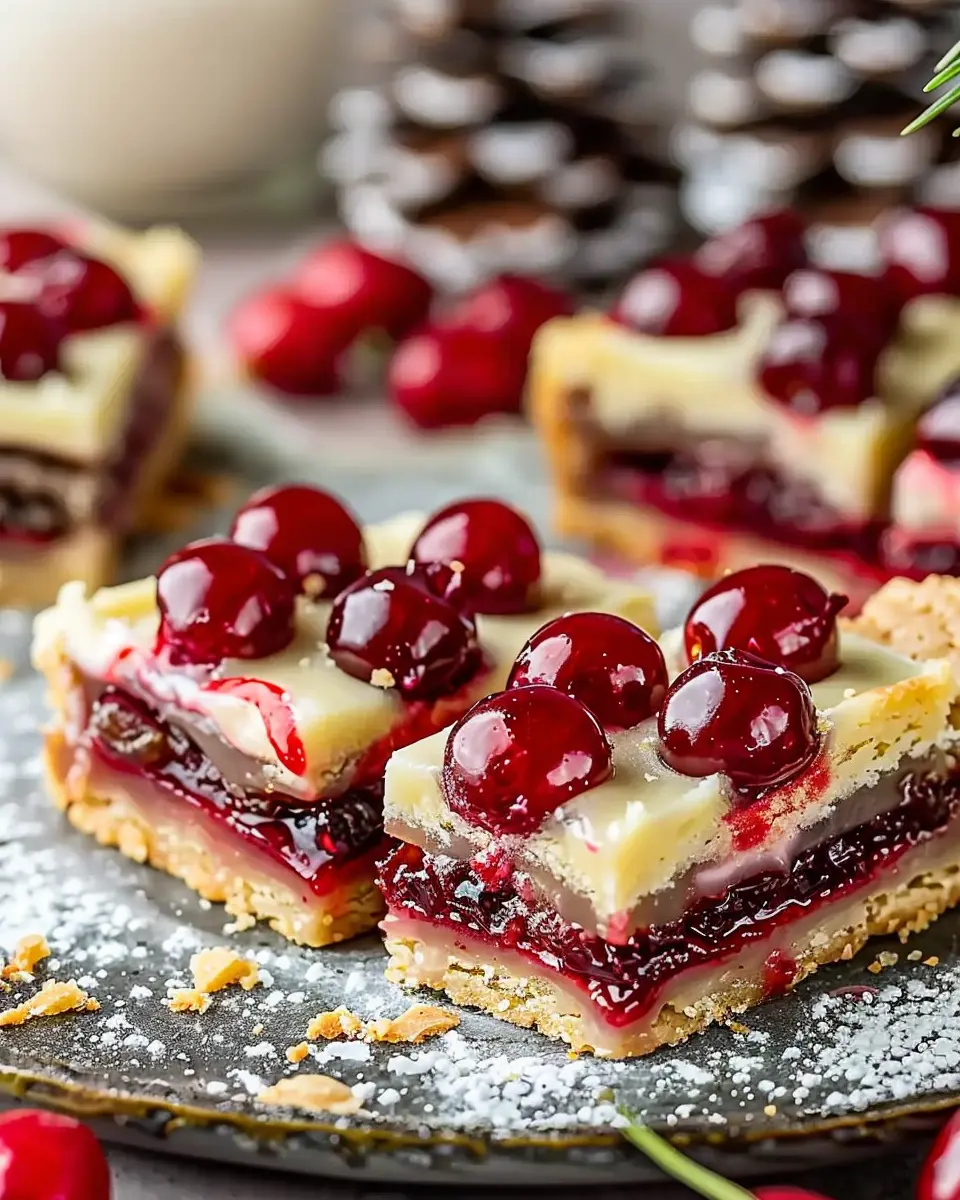
Variations on Christmas Cherry Bars
Looking to switch things up with your Christmas Cherry Bars this holiday season? Let’s explore two delicious variations that will impress your friends and family, making your festive gatherings even more special!
Almond-flavored Cherry Bars
If you love the subtle, sweet flavor of almond, this variation is a must-try! To achieve that delightful almond essence, simply replace half of the vanilla extract in the original recipe with almond extract. The nutty flavor pairs beautifully with the tartness of the cherries.
For an extra touch, consider adding sliced almonds on top before baking. This not only enhances the texture but also gives your cherry bars an elegant finish. They’ll look as good as they taste—a perfect dessert to serve at your holiday office party! Learn more about the delightful flavor combinations in culinary expert Rachel Ray’s blog.
Chocolate-covered Cherry Bars
For chocolate lovers, this version of Christmas Cherry Bars is an absolute dream. After your bars come out of the oven and have cooled, melt your favorite chocolate—dark, milk, or even white chocolate will do!
Drizzle the melted chocolate over the top, or dip each slice in the chocolate for a decadent treat. Not only does this add richness, but it complements the cherry filling wonderfully. If you’re feeling particularly ambitious, sprinkle sea salt on top for a sweet-salty contrast that will have everyone coming back for seconds.
With these variations, you’ll elevate your traditional Christmas Cherry Bars and leave your guests eagerly anticipating what you’ll bake next!
Cooking Tips and Notes for Christmas Cherry Bars
Baking Christmas Cherry Bars can fill your kitchen with warm, festive aromas, but a few simple tips can elevate your game. Here’s how to ensure your treats turn out perfectly every time.
Common Mistakes to Avoid
- Overmixing the Batter: This can lead to tough bars instead of soft, chewy ones. Mix just until combined!
- Using Old Ingredients: Check your baking powder and flour. Fresh ingredients make a significant difference in texture and flavor.
- Skipping the Cherries: Drain the cherries well to avoid a soggy batter. You want to enjoy all those fruity flavors without excess moisture.
Helpful Baking Tools
To make your Christmas Cherry Bars a breeze, consider having these tools handy:
- Mixing Bowls: Invest in a good set; they help with everything from mixing to storing.
- 9×13 Pan: A sturdy baking pan ensures even baking. Consider using a non-stick option for easy release.
- Offset Spatula: Perfect for spreading the batter evenly and smoothing out toppings.
For more tips on baking essentials, you can check out this guide from Food Network. Happy baking!
Serving Suggestions for Christmas Cherry Bars
Ideal Pairings for Your Cherry Bars
When it comes to enjoying your Christmas Cherry Bars, the possibilities are endless! Here are some delightful combinations to elevate your dessert experience:
- Fresh Cream: A dollop of whipped cream adds an airy sweetness, balancing the tartness of the cherries.
- Hot Beverages: Serve your bars with a cozy cup of hot cocoa or spiced apple cider for a comforting treat during winter festivities.
- Nutty Accents: Sprinkle some chopped nuts like almonds or walnuts on top for extra crunch and flavor.
- Ice Cream: A scoop of vanilla or gingerbread ice cream makes for an indulgent dessert—a perfect pairing with those festive flavors!
Creative Presentation Ideas
To make your Christmas Cherry Bars as visually appealing as they are delicious, consider these fun presentation ideas:
- Festive Platter: Arrange the bars on a decorative platter, complemented by some sprigs of rosemary or mint for a pop of color.
- Individual Servings: Cut the bars into smaller squares and place them in festive cupcake liners for a charming touch.
- Drizzle of Glaze: A simple glaze made with powdered sugar and a splash of lemon juice can be drizzled over the top for a beautiful finish.
For more inspiration, you might find helpful tips on presentation at sites like Food Network or Martha Stewart. By pairing and presenting your Christmas Cherry Bars thoughtfully, you’ll not only satisfy your sweet tooth but also create a warm, inviting atmosphere for your holiday gatherings!
Time Breakdown for Christmas Cherry Bars
Preparation Time
Getting started on your Christmas Cherry Bars is half the fun! You’ll need about 15 minutes for preparation. This time includes gathering all your ingredients, mixing the filling, and spreading that delightful cherry mixture onto your crust. Pro tip: Make sure your cream cheese is at room temperature for easy blending.
Baking Time
Once your bars are prepped to perfection, it’s time to pop them in the oven for about 30 minutes. Baking them allows those inviting scents to fill your kitchen, making it feel like the holidays. Keep an eye on them, as every oven varies—you’re looking for a lovely golden color on top.
Total Time
In total, you’ll be spending around 45 minutes to get these scrumptious Christmas Cherry Bars ready. Just enough time for a quick break and maybe a holiday playlist to get you in the spirit! Once they’re out and cooled, you’ll be set to share these delightful treats with friends and family. Want an extra special touch? Serve your bars with whipped cream or a scoop of vanilla ice cream for a festive flair.
For additional tips and tricks on holiday baking, check out The Kitchn’s guide on making the most of your seasonal recipes.
Nutritional Facts for Christmas Cherry Bars
When it comes to festive treats, Christmas Cherry Bars pack a delightful flavor and a mix of nutritional elements that you might want to be aware of before indulging. Let’s break down some important nutritional facts:
Calories
One serving of Christmas Cherry Bars contains approximately 150 calories. This makes them a sweet yet manageable addition to your holiday dessert spread.
Sugars
In each bar, you’ll find around 10 grams of sugar. This sweetness highlights the natural flavors of the cherries while still satisfying that festive craving. For a healthier twist, consider using natural sweeteners.
Total Fat
These tasty bars feature about 5 grams of total fat per serving. Opting for leaner fats can help you enjoy this treat without overdoing it.
As you celebrate, keep in mind that balance is key. For more insights on holiday treats, check out this guide on holiday nutrition. Enjoy your Christmas Cherry Bars responsibly!
FAQs about Christmas Cherry Bars
Can I freeze Christmas Cherry Bars?
Absolutely! Freezing your Christmas Cherry Bars is a great way to enjoy them later. To freeze, first, allow the bars to cool completely. Then, wrap them tightly in plastic wrap and place them in an airtight container. They should stay fresh in the freezer for about three months. When you’re ready to enjoy them, simply thaw them in the fridge overnight, and they’ll taste just as delightful as fresh-baked!
What should I do if my bars are too crumbly?
If your Christmas Cherry Bars turn out crumbly, don’t worry; it’s a common issue! Here are a few troubleshooting tips:
- Check your ingredients: Ensure you’ve used the right ratio of wet to dry ingredients. A little extra butter or egg can help bind them.
- Press down firmly: When you spread the mixture in the pan, press down firmly to compact it before baking. This helps create a more cohesive bar.
- Try a simple syrup: If the bars are still crumbly after baking, drizzle a bit of simple syrup over the top. This adds moisture and can improve texture.
How can I make these bars vegan?
Going vegan with your Christmas Cherry Bars is easier than you might think! Here’s how:
- Substitute eggs: Use flax eggs (1 tablespoon of ground flaxseed mixed with 2.5 tablespoons of water per egg) as a binding agent.
- Use dairy-free butter: Swap out regular butter for your favorite plant-based butter.
- Choose vegan-friendly ingredients: Ensure all your other ingredients, like chocolate, are labeled as vegan.
Making these small modifications can still yield delicious, festive bars that everyone will enjoy! If you’re looking for more vegan recipes, consider checking out PETA’s vegan recipes for inspiration.
With these tips, your Christmas Cherry Bars will be a hit at any gathering, whether you’re serving guests or just treating yourself!
Conclusion on Christmas Cherry Bars
The joy of sharing your homemade Christmas Cherry Bars
As you find yourself baking these delightful Christmas Cherry Bars, remember that the joy of sharing your creations is one of the season’s greatest treasures. Imagine your friends and family indulging in your homemade treats, delighting in the burst of cherry flavors mingling with a buttery streusel.
Baking doesn’t just fill the home with wonderful aromas; it creates moments to cherish. Consider packaging your bars in festive boxes, perhaps alongside a warm beverage like hot cocoa, for a thoughtful gift. Sharing treats spreads joy and strengthens bonds—what better way to embrace the spirit of the holidays than with a sweet, heartfelt gesture? For more festive ideas, check out sites like Food Network or Martha Stewart for inspiration.
PrintChristmas Cherry Bars: Easy Recipe for a Joyful Holiday Treat
Enjoy a delightful treat this holiday season with our Christmas Cherry Bars, perfect for festive gatherings.
- Prep Time: 15 minutes
- Cook Time: 30 minutes
- Total Time: 45 minutes
- Yield: 12 bars 1x
- Category: Dessert
- Method: Baking
- Cuisine: American
Ingredients
- 1 cup all-purpose flour
- 1/2 cup granulated sugar
- 1/4 cup butter, melted
- 2 cups cherries, pitted and halved
- 1 teaspoon vanilla extract
- 1/4 teaspoon salt
- 1 egg, beaten
Instructions
- Preheat the oven to 350°F (175°C).
- In a mixing bowl, combine flour, sugar, melted butter, and salt.
- Add the beaten egg and vanilla extract, mixing well.
- Fold in the cherries.
- Pour the mixture into a greased baking dish.
- Bake for 25-30 minutes or until golden brown.
- Let cool before cutting into squares.
Notes
- For extra flavor, consider adding almond extract.
- Serve with whipped cream or ice cream.
Nutrition
- Serving Size: 1 bar
- Calories: 150
- Sugar: 10g
- Sodium: 50mg
- Fat: 5g
- Saturated Fat: 3g
- Unsaturated Fat: 2g
- Trans Fat: 0g
- Carbohydrates: 22g
- Fiber: 1g
- Protein: 2g
- Cholesterol: 30mg
Keywords: Christmas Cherry Bars, holiday treat, easy recipe