
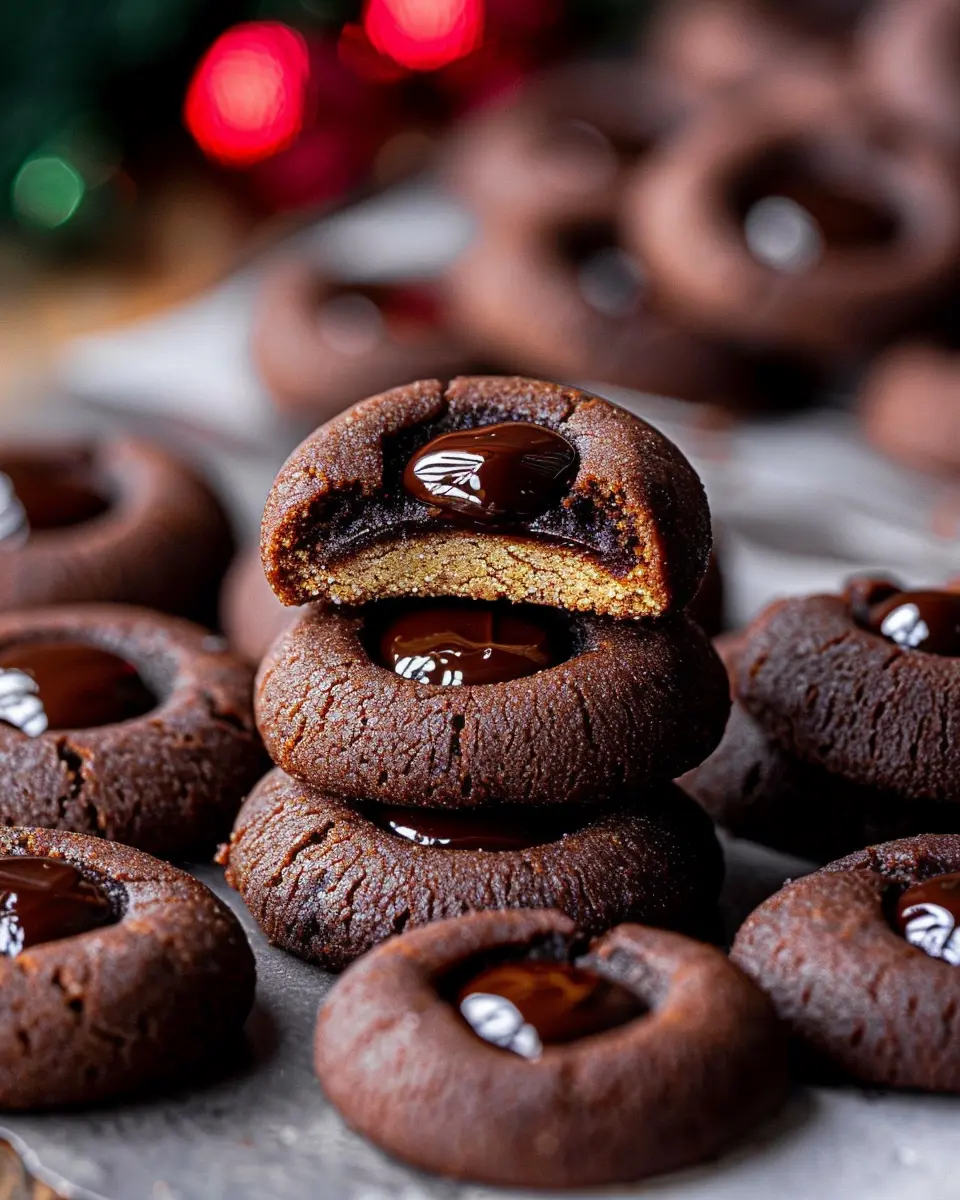
Introduction to Chocolate Thumbprint Cookies
If you’re a chocolate lover, you know there’s nothing quite like the deep, rich flavor of chocolate to satisfy a sweet tooth. Enter chocolate thumbprint cookies, an irresistible treat that combines a soft, buttery cookie with a luscious chocolate filling. They are not just cookies; they are an experience that elevates casual baking to a delightful art form. These cookies boast a unique design—a little thumbprint in the center that’s waiting to be filled—making them visually appealing and delicious.
Why Chocolate Thumbprint Cookies are a Must-Try for Every Chocolate Lover
First off, what’s not to love about chocolate? According to a study published by the American Chemical Society, chocolate can release endorphins and make you feel happier! Now, imagine that joy nestled in each bite of a chocolate thumbprint cookie. They are easy to prepare, making them perfect for both novice bakers and seasoned pros. Just think of how satisfying it is to create something scrumptious with your own hands.
These cookies typically feature a rich cocoa base that balances perfectly with a filling of your choice—be it a silky chocolate ganache, creamy peanut butter, or even tangy fruit preserves. The contrast of textures—soft cookie and smooth filling—takes every bite to another level. Besides, these cookies can be customized to your personal taste.
Another reason to indulge? They make great gifts! Wrap them up in a decorative box, and you’ll have a delightful present for birthdays, holidays, or just because. Sharing a batch could lead to a delightful conversation; after all, everyone loves a good cookie.
If you’re looking to explore more delicious variations on this classic treat, check out Baker’s Journal for some creative twists and tips from professional bakers.
So, whether you’re planning a cozy night at home or looking for something special to bring to a gathering, chocolate thumbprint cookies are the perfect choice. Get ready to impress your friends, family, or even yourself with these delectable delights!

Ingredients for Chocolate Thumbprint Cookies
Essential ingredients for a perfect cookie batch
Creating the perfect chocolate thumbprint cookies starts with high-quality ingredients. Here’s what you’ll need:
- All-purpose flour: Provides the structure.
- Unsweetened cocoa powder: Gives your cookies that deep, chocolatey flavor.
- Granulated sugar: Balances the richness, making for a sweet surprise.
- Brown sugar: Adds moisture and depth with its caramel notes.
- Butter: Choose unsalted for the best control over flavor.
- Eggs: This binds everything together perfectly.
- Vanilla extract: A splash of vanilla elevates the flavor profile.
Optional additions for a flavor twist
Why stop at classic when you can have fun with your chocolate thumbprint cookies? Consider these delightful enhancements:
- Chocolate chips: For extra chocolaty goodness, mix in some semisweet or dark chocolate chips.
- Nuts: Chopped walnuts or pecans sprinkled in can add texture.
- Spices: A dash of cinnamon or espresso powder can amp up the depth.
Feel free to experiment! These ingredients not only ensure delicious cookies, but they can also inspire your creativity in the kitchen. Want more tips on baking or ingredient substitutions? Check out this resource for expert advice.
Incorporating these elements will help you create cookies that are not just good, but unforgettable! What are you excited to try in your own version?
Step-by-Step Preparation of Chocolate Thumbprint Cookies
Baking chocolate thumbprint cookies is more than just a delicious treat; it’s a joyful experience you can share. So, let’s dive right into preparing these delightful morsels, a perfect blend of crisp and melt-in-your-mouth chocolate goodness!
Gather Your Tools and Ingredients
Before you start mixing and baking, take a moment to gather everything you need. This keeps your workspace organized and makes the process much smoother. Here’s what you’ll need:
Tools:
- Mixing bowls
- Electric mixer or whisk
- Baking sheets
- Parchment paper
- Measuring cups and spoons
- Spoon or small cookie scoop
- Oven
Ingredients:
- 1 cup unsalted butter, softened
- 1 cup granulated sugar
- 2 cups all-purpose flour
- 1/2 cup unsweetened cocoa powder
- 1/4 teaspoon salt
- 1 teaspoon vanilla extract
- 1/2 cup chocolate chips (for filling)
Feel free to scoop some chocolate chips from your stash—they’re a great snack while you bake!
Prepare the Cookie Dough
Once you have your gear lined up and your ingredients prepped, it’s time to dive into the dough. Start by preheating your oven to 350°F (175°C), so it’s nice and hot when your cookies are ready to go.
In a mixing bowl, cream together the softened butter and granulated sugar until the mixture is light and fluffy. This should take about 3-4 minutes. Pro tip: Use an electric mixer if you have one; it saves time and gives your cookies that perfect texture.
Next, add the vanilla extract to the mix and combine. In another bowl, whisk together the flour, cocoa powder, and salt. Gradually add these dry ingredients to the butter mixture and mix until everything is just combined. Avoid overmixing; your cookies will thank you!
Shape the Cookies and Create Thumbprints
Now comes the fun part! Take a small amount of dough (about a tablespoon), roll it into a ball, and place it on your parchment-lined baking sheet. Leave space between each ball to allow for spreading.
Once your dough balls are in place, it’s time to make those classic thumbprints. Using your thumb (or the back of a spoon if you’re worried about the residue), gently press into the center of each ball, making a deep impression. This is where all the rich chocolate filling will go later.
Bake the Cookies to Perfection
Pop your baking sheets in the preheated oven and let those little rounds of heaven bake for about 12-15 minutes. You want the edges to be set but the centers should still be soft. After baking, let them cool on the sheet for a few minutes before transferring them to a wire rack to cool completely. It’s important to be patient here; your chocolate thumbprint cookies need a moment to firm up!
Fill the Thumbprints with Chocolate
Once your cookies have cooled, it’s time for the grand finale! Melt the chocolate chips in a microwave-safe bowl or using a double boiler. If you choose the microwave method, heat the chips in 30-second intervals, stirring between each session until the chocolate is smooth and melted.
Carefully spoon or pipe the melted chocolate into each thumbprint of your cookies. There’s something so satisfying about this step; seeing the rich chocolate fill those little wells adds the perfect finishing touch.
Let the cookies set for a few minutes until the chocolate hardens, and voilà! You’ve mastered the art of making chocolate thumbprint cookies. Enjoy them with a hot cup of coffee or share with friends for a delightful treat. For further inspiration, consider checking out more wonderful cookie recipes from Food Network, where variety flourishes.
Now, who will you share your creations with? Happy baking!

Variations on Chocolate Thumbprint Cookies
Nutty Chocolate Thumbprint Cookies
Transform your classic chocolate thumbprint cookies into a nut lover’s dream! Simply incorporate chopped nuts into the cookie dough. Pecans, walnuts, or even hazelnuts add delightful crunch and flavor. You might also consider using nut butter, like almond or hazelnut, in place of some of the butter. Not only does this add a rich depth to your cookies, but it also helps tie together the sweet chocolate with earthy notes.
To add a finishing touch, sprinkle some crushed nuts atop the filling before it sets. Remember, pairing with a creamy chocolate ganache or a layer of dark chocolate can really elevate the treat. If you’re curious, check more nut variations here.
Spiced Chocolate Thumbprint Cookies
Feeling adventurous? Elevate your chocolate thumbprint cookies with spices! Adding a pinch of cinnamon, ginger, or nutmeg to your cookie dough creates a warm, inviting flavor that’s perfect for the fall or winter months. This twist not only makes the cookies unique but also challenges the palate by harmonizing the sweetness of chocolate with aromatic spices.
For an added kick, consider swirling in some cayenne or even espresso powder into your chocolate filling. These variations will wake up your taste buds and make each bite unforgettable. If spicy treats intrigue you, dive into more ideas here.
By trying out these variations, you can keep your cookie game fresh and exciting. Plus, who doesn’t love a cookie that surprises? Whatever you choose, these delightful twists will have your friends and family begging for the recipe!
Cooking Tips and Notes for Chocolate Thumbprint Cookies
Common pitfalls to avoid
When baking chocolate thumbprint cookies, it’s easy to stumble into a few common traps. First, be careful not to overmix your dough. This can lead to tough cookies instead of the tender, melt-in-your-mouth treat you want. Also, ensure your thumbprint nests are deep enough; shallow impressions might lose their shape during baking.
Another tip? Watch the baking time closely! Cookies can go from perfectly soft to overcooked in a matter of moments. Using a quality oven thermometer can help keep your temperature just right.
How to achieve the perfect texture
Achieving that perfect texture in your chocolate thumbprint cookies is all about balance. For a fudgy center, aim for a dough that’s slightly sticky but manageable. Chilling your dough for about 30 minutes can make it easier to handle and create a better crumb.
Lastly, consider using high-quality chocolate for the filling; it elevates the flavor significantly. If you’d like to learn more about choosing the right chocolate, check out MyChocolateSource.com for expert advice.
By keeping these tips in mind, your chocolate thumbprint cookies will turn out delightful every time!
Serving Suggestions for Chocolate Thumbprint Cookies
When it comes to chocolate thumbprint cookies, presentation can elevate your cookie game from delightful snack to a stunning treat. Here are some creative ways to showcase your cookies:
Creative Ways to Present Your Cookies
- Cookie Jar Display: Fill a clear glass jar with your thumbprint cookies and tie a simple ribbon around it. This makes for a lovely centerpiece.
- Mini Gift Boxes: Package a few cookies in small boxes for a personalized gift. Add a handwritten note to make it special.
- Platter Arrangement: Arrange cookies on a decorative platter, interspersing them with fresh fruit to create a colorful and appetizing spread.
Pairing with Beverages for an Enhanced Experience
Perfectly pairing your chocolate thumbprint cookies with drinks can make your treat even more enjoyable.
- Milk: The classic choice! Whether it’s whole, almond, or oat milk, the creaminess complements chocolate perfectly.
- Tea: A warm cup of chai or a refreshing mint tea works wonderfully with the rich flavors of the cookies.
- Coffee: A rich espresso or a mocha can elevate the chocolate experience, balancing sweetness with a bold coffee flavor.
By exploring these serving suggestions, you can enhance your enjoyment of chocolate thumbprint cookies while impressing your family and friends! For more tips on cookie presentations, check out this guide from The Kitchn.
Time Breakdown for Chocolate Thumbprint Cookies
When baking chocolate thumbprint cookies, knowing how much time you’ll need helps streamline the process and ensures delicious results. Here’s a friendly breakdown to guide you through!
Preparation Time
Getting started is quick! You’ll spend about 15-20 minutes gathering your ingredients and mixing the dough. Setting the atmosphere with your favorite tunes can make this prep time even more enjoyable!
Baking Time
Once your cookies are formed and ready, they’ll need about 12-15 minutes in the oven. Keep a close eye on them—you want that perfect balance of chewy and crispy.
Cooling Time
After baking, resist the urge to munch right away! Allow the cookies to cool for 10-15 minutes on the baking sheet before transferring them to a wire rack. This cooling time lets them set up beautifully.
By organizing your time effectively, you’ll find that whipping up these delightful chocolate thumbprint cookies can be both simple and satisfying. For more tips and suggestions on baking, check out resources like King Arthur Baking and Serious Eats!
Nutritional Facts for Chocolate Thumbprint Cookies
Calories Per Cookie
Each chocolate thumbprint cookie contains approximately 100 calories. While this treat is sweet and satisfying, moderation is key—especially if you’re indulging in a few after dinner or as an afternoon snack.
Key Nutrients
These delightful cookies offer more than just a taste of heaven. Here’s a breakdown of their key nutrients:
- Fat: They contain healthy fats from the chocolate and butter, which can be a part of a balanced diet.
- Carbohydrates: With sugar and flour, cookies provide quick energy, making them perfect for a midday pick-me-up.
- Protein: While not a significant protein source, the eggs contribute to your daily intake.
For more on nutritional guidelines, check out resources from the USDA. Making informed choices allows you to enjoy your baked goods without stress!
FAQs about Chocolate Thumbprint Cookies
Can I use gluten-free flour for this recipe?
Absolutely! You can substitute regular flour with a gluten-free blend to make delicious chocolate thumbprint cookies. Look for a mix that contains xanthan gum, as this will help achieve the right texture. Many people find success with brands like Bob’s Red Mill or King Arthur Flour. Just remember that gluten-free flours can vary, so the texture might differ slightly, but they’ll still be equally delightful!
How can I store leftover cookies?
Storing your chocolate thumbprint cookies properly will ensure they stay fresh and tasty for days. Here are some handy tips:
- Room Temperature: Place cookies in an airtight container at room temperature for up to one week.
- Freezing: If you want to enjoy them later, freeze the cookies in a single layer on a baking sheet, then transfer them to a freezer-safe container. They can last up to three months this way.
- Thawing: When you’re ready to munch on them, simply let them sit at room temperature for a bit or pop them in the microwave for a few seconds.
Is there a vegan substitute for the butter in the recipe?
Yes! To make your chocolate thumbprint cookies vegan, use a plant-based butter or coconut oil in equal measurements. Brands like Earth Balance or coconut oil can be perfect choices and will not compromise the flavor. Additionally, if you’re looking for a non-dairy alternative, applesauce or mashed bananas can sometimes work too, adding a nice sweetness.
If you’re diving deeper into baking alternatives, consider checking out resources like Vegan Baking for more guidance. Happy baking!
Conclusion on Chocolate Thumbprint Cookies
Reflecting on the joy that chocolate thumbprint cookies bring, it’s clear they hold a special place in the world of homemade treats. Their delightful combination of rich chocolate and creamy fillings can transform any ordinary day into a celebration.
Imagine surprising a friend with a batch or indulging in them during a cozy night in. The beauty of these cookies lies in their versatility—they can be customized with your favorite jam or even nut butter for a personal touch. Want to dive deeper into cookie decorations? Check out this helpful resource for tips!
Embrace the happiness these cookies bring, and remember, there’s always room for a little more sweetness in life. For more ideas on creating delightful desserts, consider visiting this dessert blog. Happy baking!
PrintChocolate Thumbprint Cookies: Easy Indulgence for Every Occasion

Delicious chocolate thumbprint cookies that are perfect for any occasion, filled with your favorite jams or chocolate ganache.
- Prep Time: 15 minutes
- Cook Time: 15 minutes
- Total Time: 30 minutes
- Yield: 24 cookies 1x
- Category: Desserts
- Method: Baking
- Cuisine: American
Ingredients
- 1 cup unsalted butter
- 2 cups all-purpose flour
- 1 cup granulated sugar
- 1/2 cup cocoa powder
- 1 teaspoon vanilla extract
- 1/2 teaspoon salt
- 1/2 cup jam or chocolate ganache
Instructions
- Preheat your oven to 350°F (175°C).
- In a large bowl, cream together the butter and sugar until light and fluffy.
- Mix in the vanilla extract and salt.
- Add flour and cocoa powder, and mix until combined.
- Roll dough into small balls and place on a baking sheet.
- Create a small indentation in the center of each ball.
- Fill each indentation with jam or chocolate ganache.
- Bake for 12-15 minutes or until set.
- Let cool and enjoy!
Notes
- For a richer flavor, use high-quality cocoa powder.
- Experiment with different fillings for a variety of tastes.
Nutrition
- Serving Size: 1 cookie
- Calories: 120
- Sugar: 10g
- Sodium: 50mg
- Fat: 7g
- Saturated Fat: 4g
- Unsaturated Fat: 2g
- Trans Fat: 0g
- Carbohydrates: 15g
- Fiber: 1g
- Protein: 2g
- Cholesterol: 30mg
Keywords: Chocolate Thumbprint Cookies